


In the previous posts, we demonstrated how to create Jenkins jobs and integrate them with the external git repository. We haven't discussed how can we trigger the jobs. Normally there are three ways to trigger the Jenkins jobs.
Manually as we tested the jobs
Scheduling: trigger job on scheduled times. For long-running tests or tasks that need to run only weekly/monthly.
Automatically: Trigger automatically when changes happen in the git repository through Webhooks.
In this post, I am going to show how to trigger Jenkins jobs through Webhooks.
Normal Pipeline Task
We will use Jenkins and Gitlab as the demo.
Install Plugin
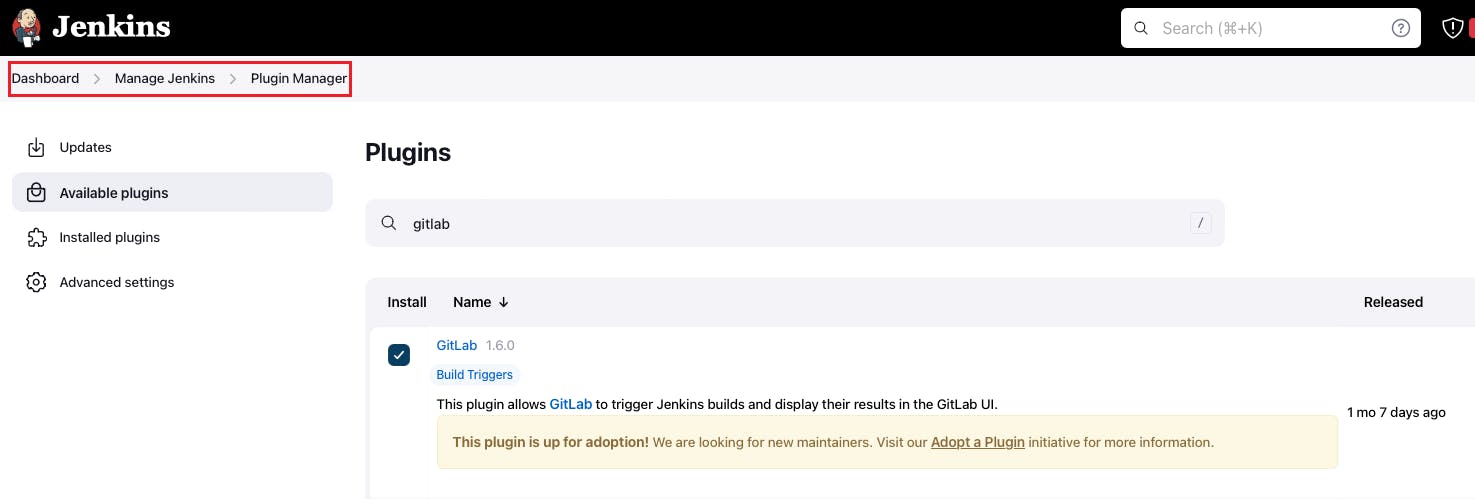
Go to Manage Jenkins -> Plugin Manager and install Gitlab without restarting.
Then we need to configure Gitlab Plugin. We need to access Gitlab from Jenkins. To do this, we need to configure the credential and install the Gitlab plugin in Jenkins.
Let us first configure the credential.
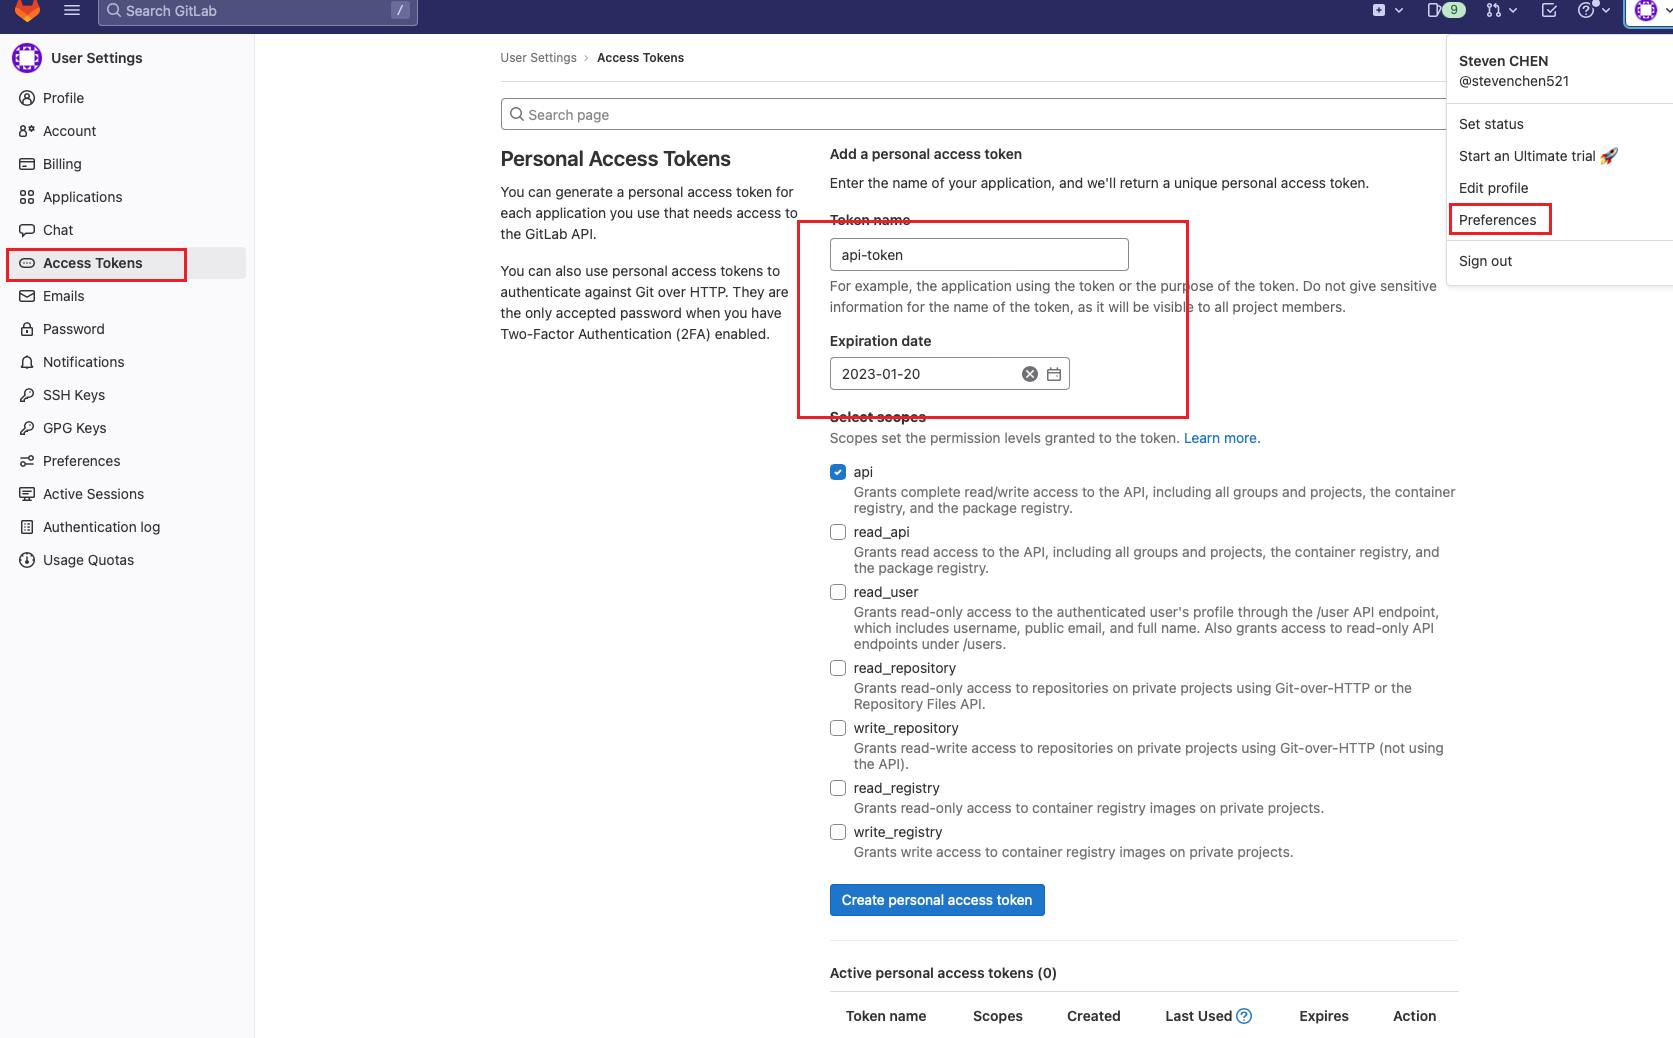
- In Gitlab, go to "Preference -> Access Tokens" and create the personal access token.
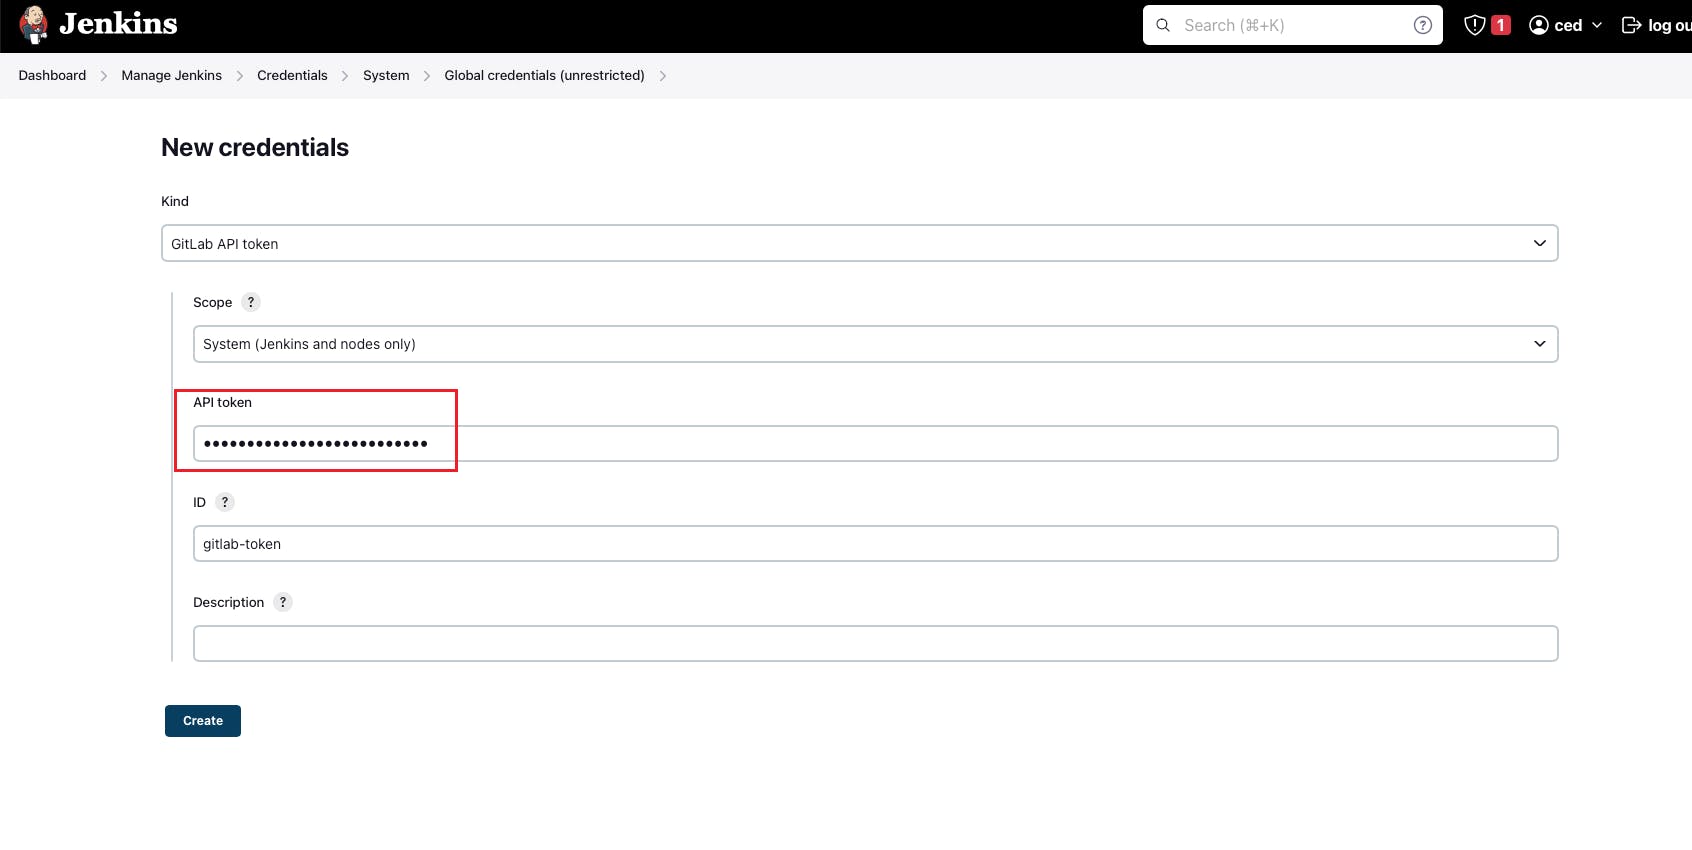
In Jenkins, create a new credential and copy the created Gitlab token to the filed "API Token" as follows. And then save it.
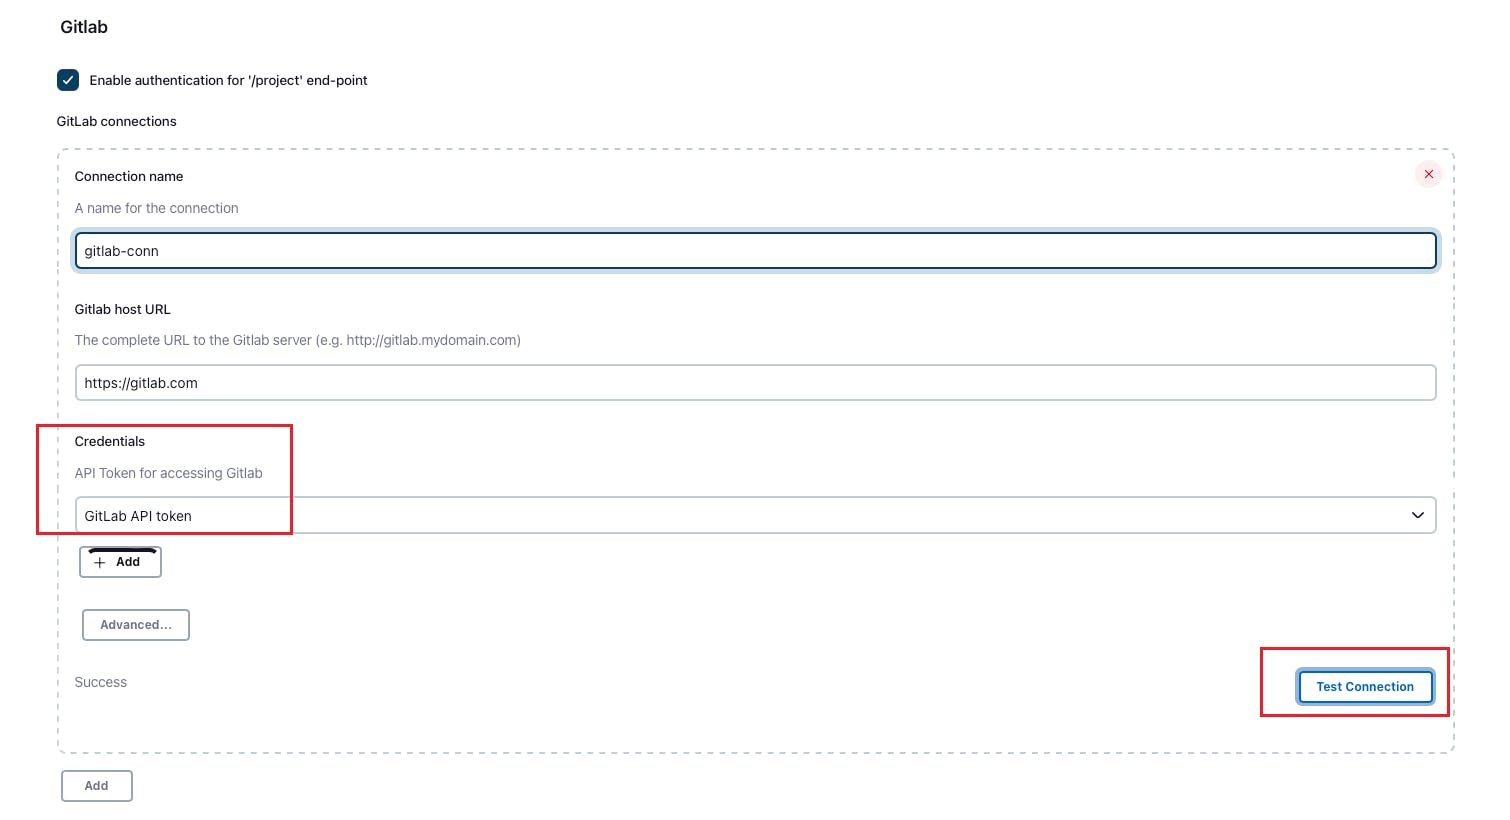
Then we go to "Manage Jenkins -> Configure System" and configure the Gitlab connection.
Configure Pipeline Job
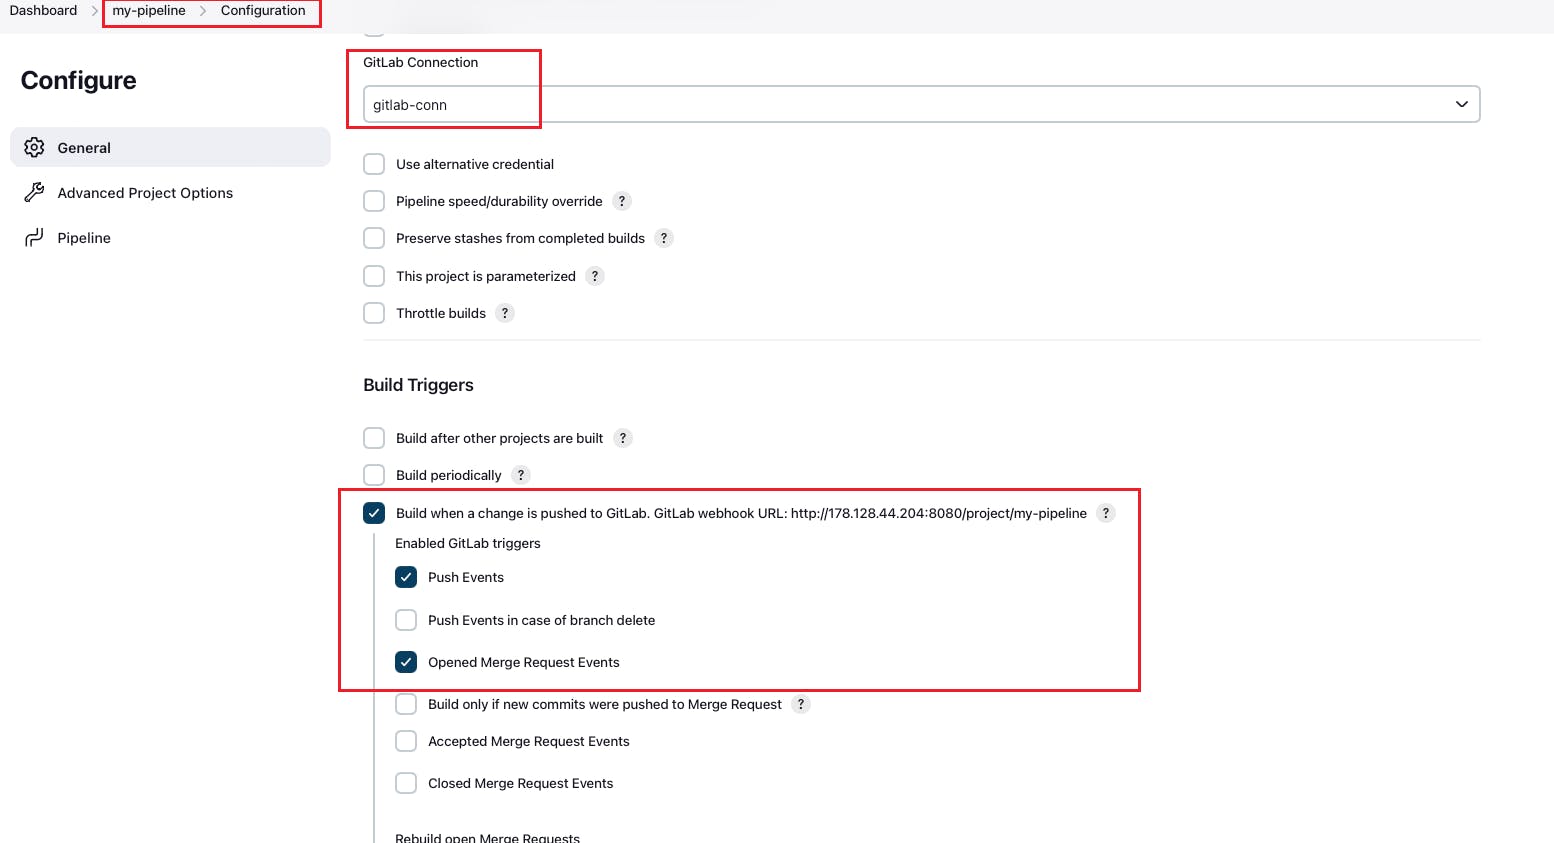
Once we finished the plugin installation, we go to the pipeline job we defined in the blog and we can see the additional section "GitLab Connection". And we enable the GitLab triggers which will trigger the job running when there is some "Push Events" and "Opened Merge Request Events".
Configure Gitlab Repository
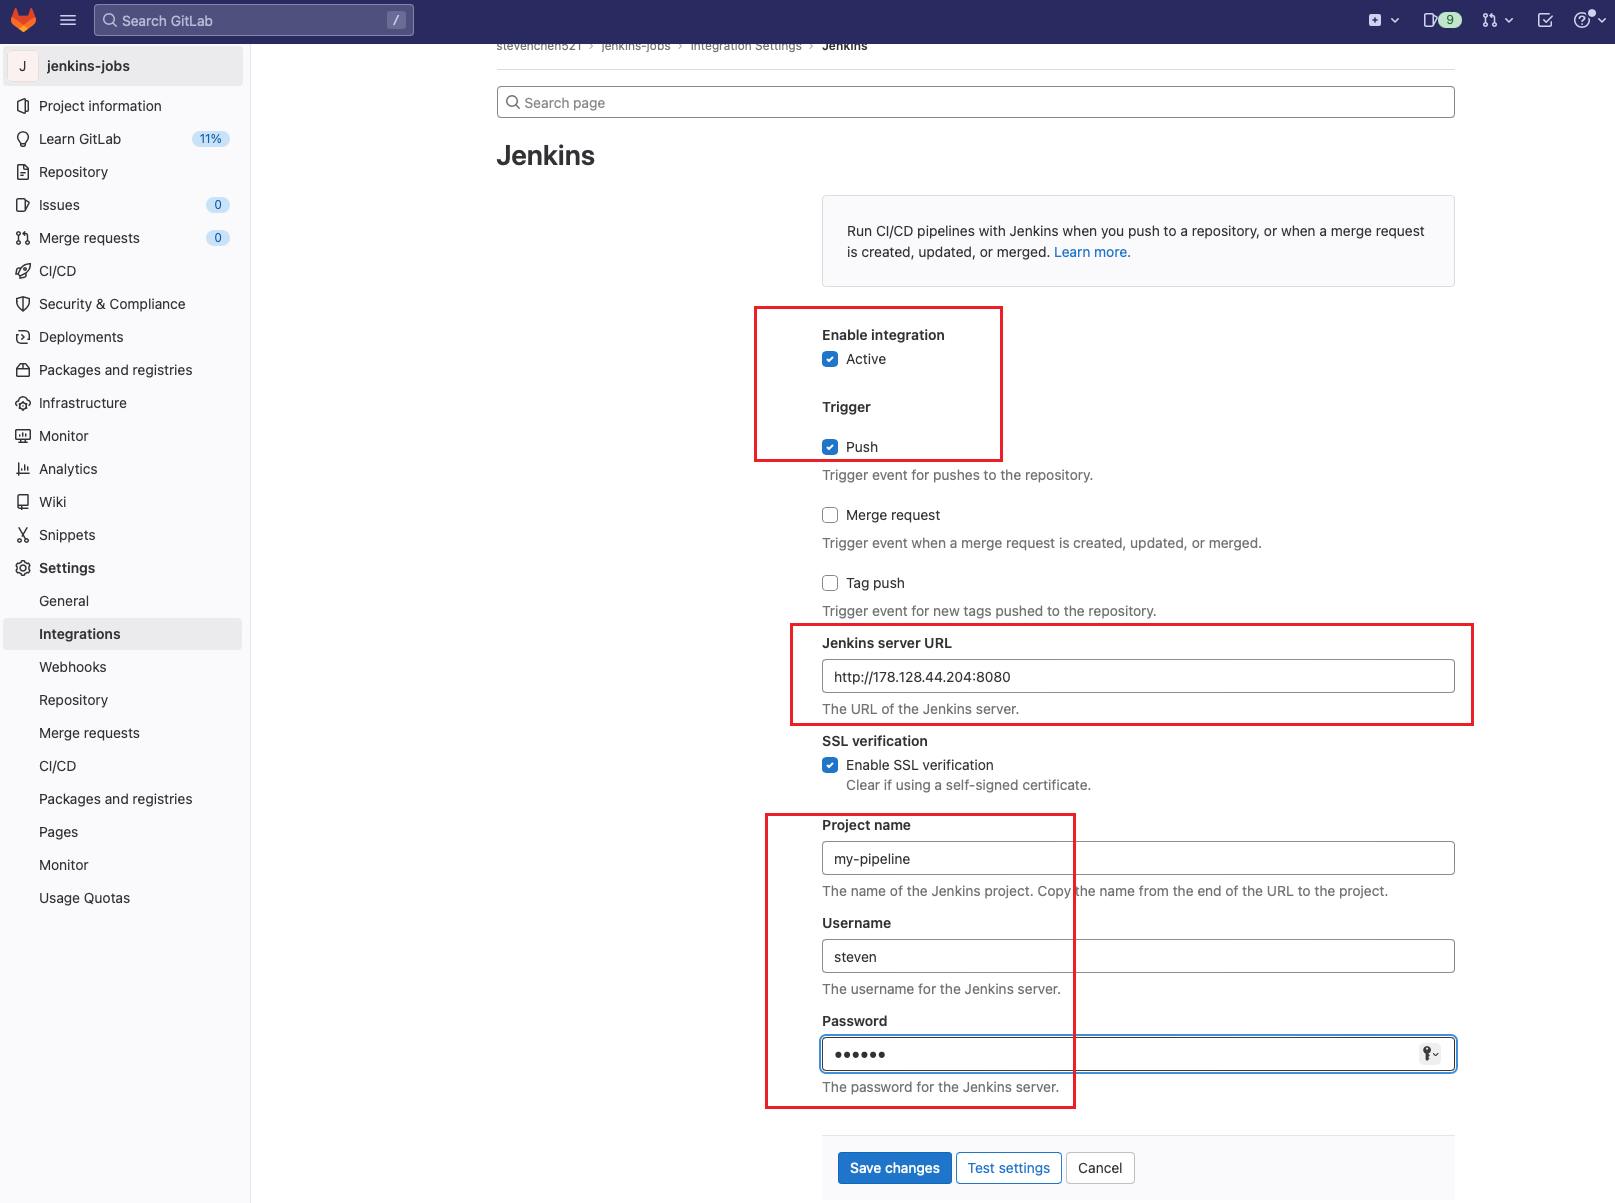
Go to our sample repository, then "Settings -> Integrations -> Jenkins". We configure Jenkins as follows.
We fill in the Jenkins server URL, "Username" and "Password". The project name is our job name. Then we save the changes.
Test
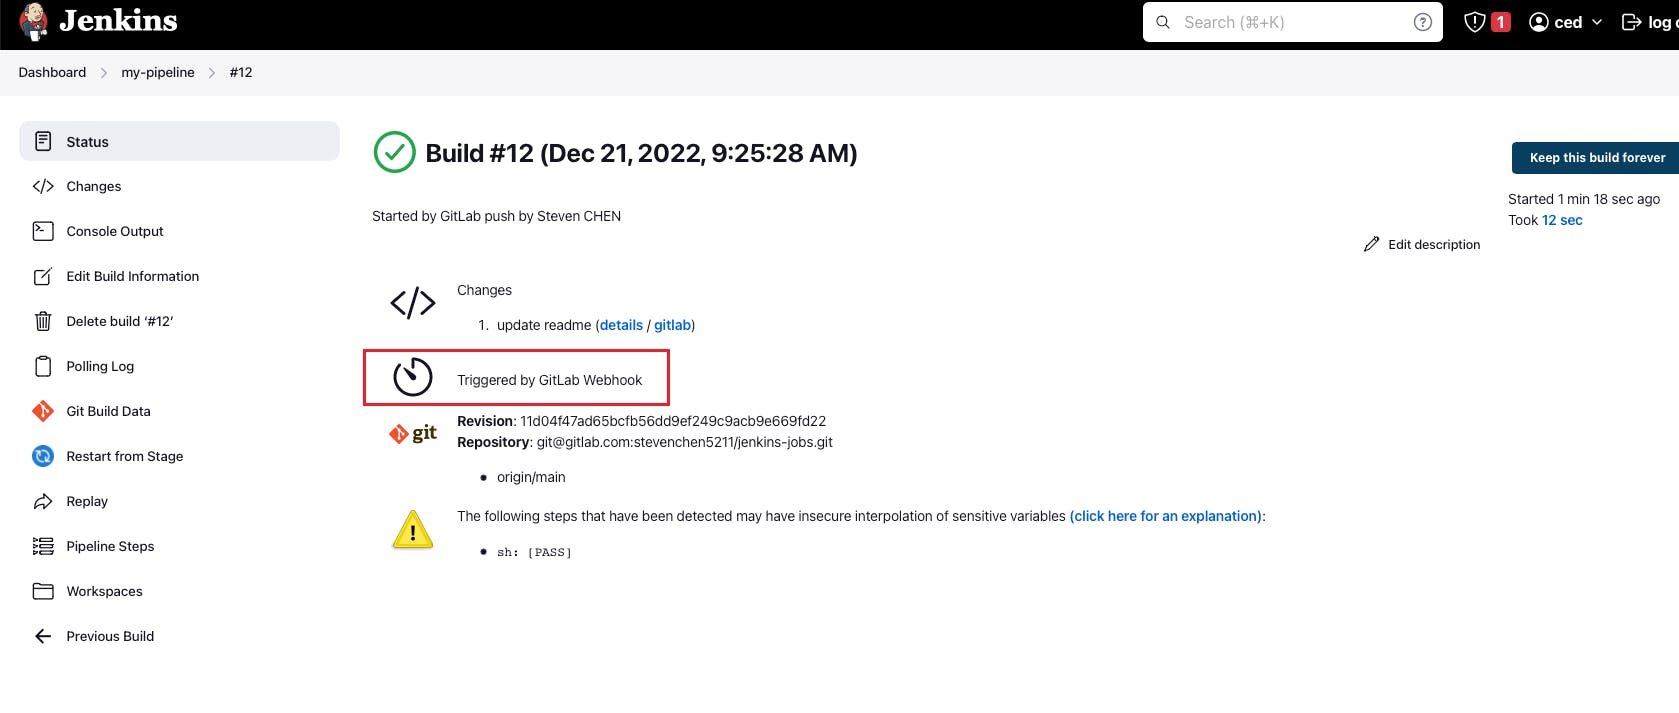
Now it is ready for the test. We push the changes to the Gitlab repo and we can see the Pipeline Job is triggered by the push.
Multi-Branch Pipeline
When it comes to the multi-branch pipeline, the Webhook triggering setup is different.
Install Plugin
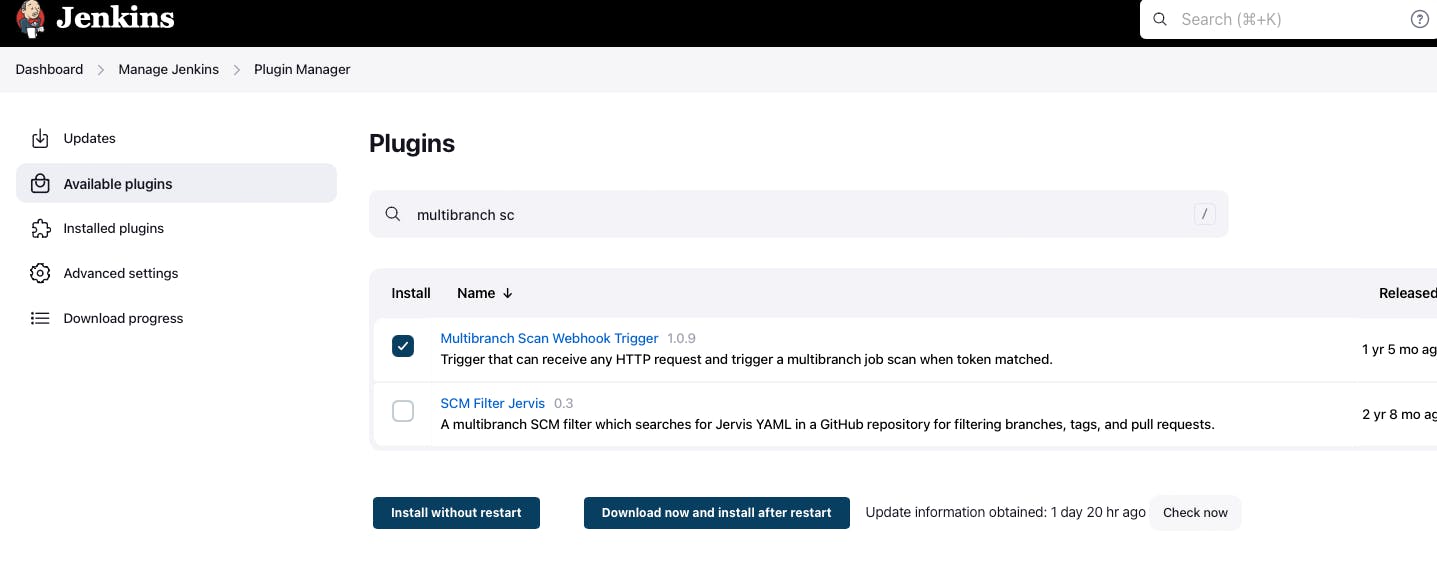
First, we need to install another plugin named "Multibranch Scan Webhook Trigger".
Configure Multi-Branch Pipeline Job
We use the multi-branch job defined in the previous post. Go to the configuration and in the section "Scan Multibranch Pipeline Triggers" we select "Scan by webhook". Here we can input any token name that will be used in the Gitlab configuration later.

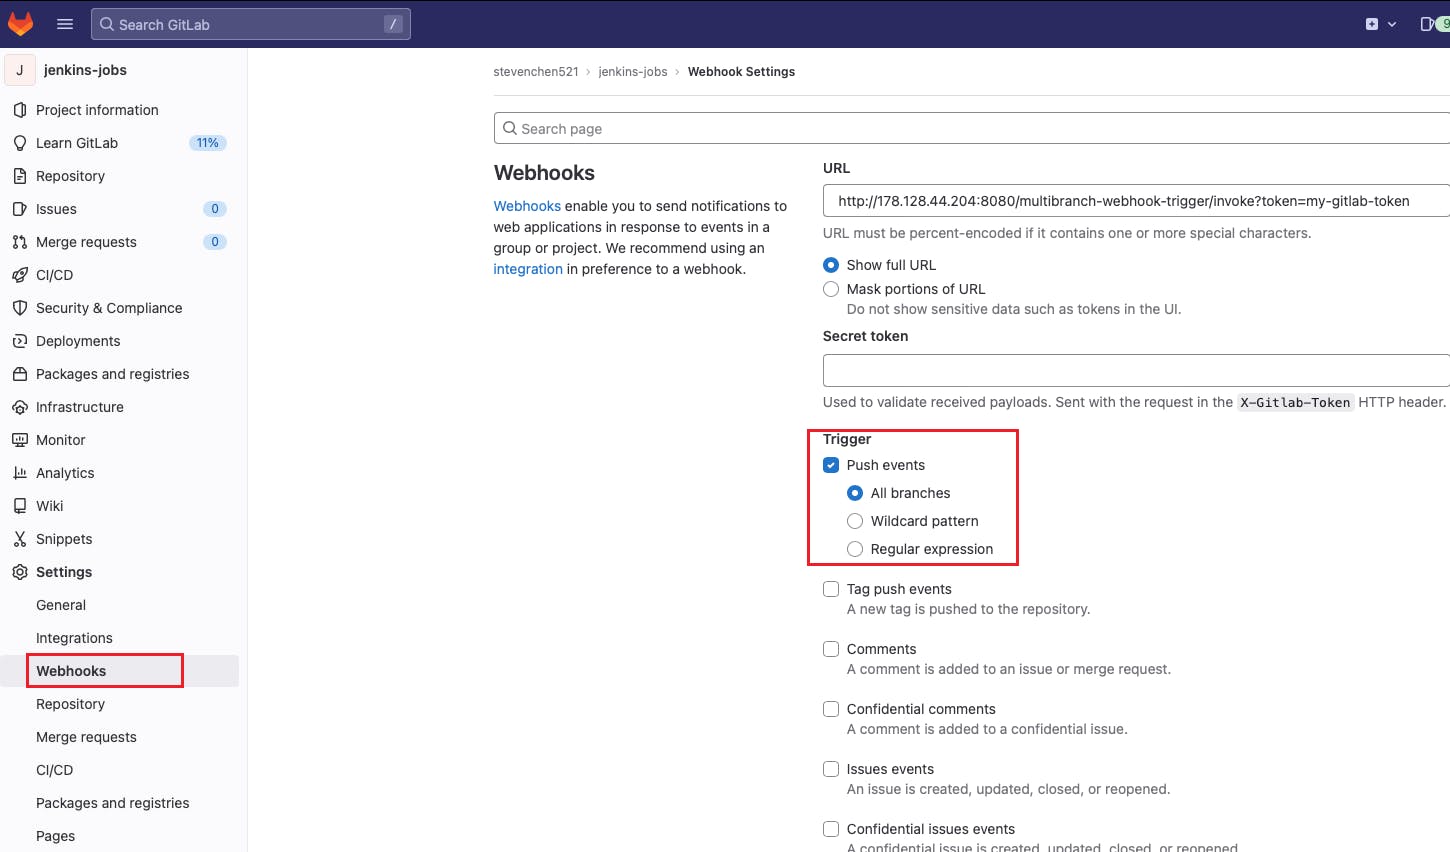
Here if we click the question mark, we will see the hint of the configuration in Gitlab. There is an URL "JENKINS_URL/multibranch-webhook-trigger/invoke?token=[Trigger token]" which will be configured in Gitlab or other git repositories. Note we need to replace the "JENKINS_URL" with our Jenkins Server address and port,
Add Webhook to Gitlab
In our sample repository, we go to "Setting -> Webhooks", input the URL and select "Push events". Then we save it.
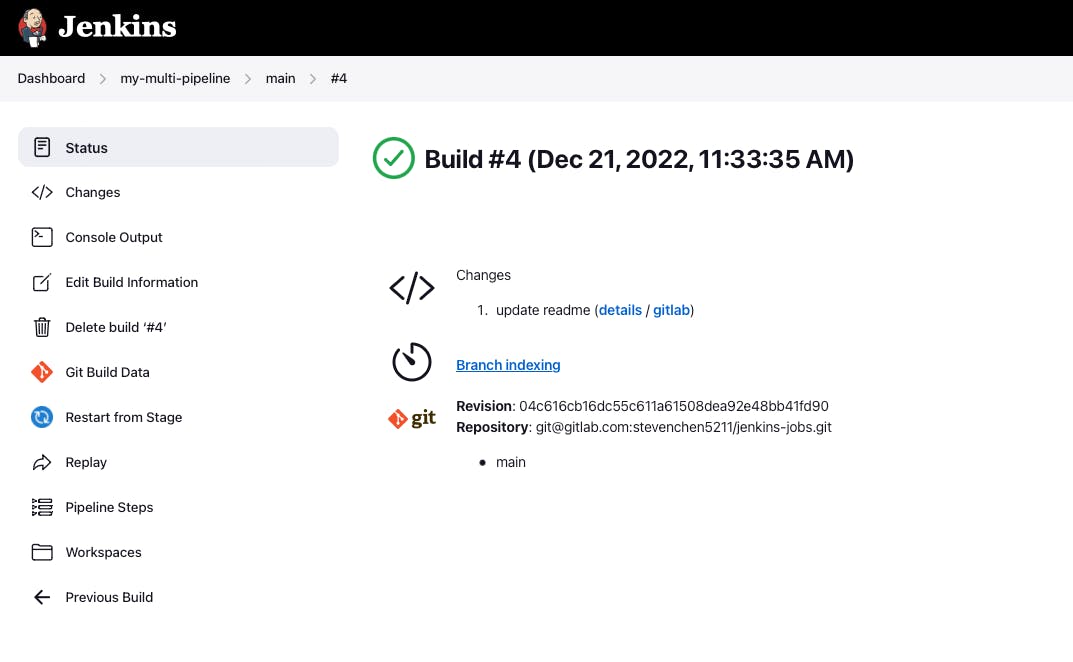
Test
Now we have completed all the changes and can do the test. We push some change to the main branch of the repository. We can see the multi-branch pipeline job is triggered.
Summary
In this blog, we demonstrated how to trigger the pipeline job and multi-branch pipeline job in Jenkins automatically with Webhook.
Reference
Module 8 of DevOps Bootcamp